
With more and more businesses heading towards remote working, having an effective time-tracking system is essential. Jira time reports provide the ability to track and manage remote teams’ performance quickly and accurately.
With easy access to time data, businesses can better understand their team’s progress on projects and tasks. Being able to monitor how employees spend their time allows for greater efficiency when it comes to resource allocation, budgeting, and project management.
Today, we’ll look at a Jira time report, why you need one, and how to get the most out of your Jira time report.
What is A Time Report?
A time report is a summary of the hours that have been logged into Jira by team members. It includes information such as when work started and stopped, which tasks were completed, who worked on them, and how long each task took.
The report produces a detailed view of employee performance or breakdowns of individual employees’ timesheets over a certain period. You can then use the data to track progress and identify improvement areas.
More Time Report Features
Additionally, advanced time reporting tools of Jira often include the following features:
- Invoice generation: If your team is working on client projects, you can use the data from Jira to create accurate invoices for each project. You can also track billable hours and compare them with actual hours worked.
- Cost control and monitoring: Time reports may include information about how much time was spent on each task or project. This allows you to identify where your team spends the most time and money so that you can make changes accordingly.
For example, if a specific task takes too long, you can adjust the budget or resources allocated.
- Performance and HR metrics: Time reports have several tools to measure productivity and performance. You can track the time taken to complete tasks, how often employees work on specific projects, and which team members take longer than others.
What Makes Up a Time Report in Jira?
Jira provides excellent insights into the hours your team has logged for tasks. The report can include information such as:
- Original estimate: The time that you have initially estimated and allocated for the task.
- Estimated time remaining: Remaining time from the original estimate.
- Time spent: Actually used up time according to the tracked data.
- Accuracy: Comparison of your estimated time with the actual time.
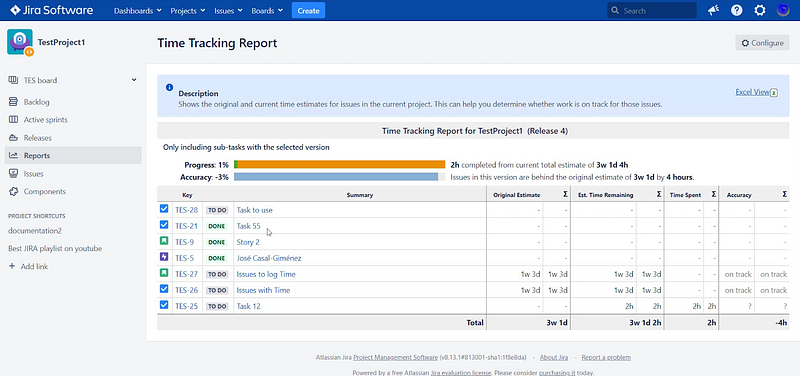
You can also configure Jira to track estimates versus actuals to compare target goals with actual performance. This is especially useful when it comes to monitoring performance against deadlines. You’ll have a clear view of how well your team is doing concerning expectations set by management.
Why Need a Time Report?
Time reports are a great way to measure team performance and ensure everyone is on track. By understanding how employees spend their time, you can better allocate resources and improve workflow efficiency.
Here are some potential benefits a well-prepared time report can give you.
- Accurate task management and tracking: Time reports allow you to track how your team spends their time accurately. This can help you identify which tasks are taking longer than they should and make adjustments accordingly. This is incredibly useful for efficient tasks and project management.
- Creating automated payroll and client invoices: You can quickly create accurate payrolls and invoices for clients using the data from your Jira time report. This ensures that employees get paid on time and that you receive payment for the work done on time. Also, you can automate the process, so you don’t have to enter the data manually each time.
- Better task assignment: Time reports can help you assign tasks to the right people. By understanding how long each task takes and who is best at completing them, you can ensure that all employees work on their strengths and achieve maximum efficiency.
- Task prioritization and deadlines: You will know precisely how long each task takes, allowing you to set realistic goals and deadlines. This ensures that your team can complete tasks on time, which can lead to greater efficiency and higher ROI.
- Visual reporting and insights: Time reports visually represent the data to analyze trends and progress quickly. With this information, you can determine where resources need to be allocated for maximum efficiency.
- Integration of third-party tools: You can also integrate Jira time reports with many third-party tools, automating many tasks and streamlining your workflow.
How to Properly Enable and Configure a Jira Time Report
Jira offers a powerful time-tracking system that provides detailed insights into how your team is spending their working hours. However, before you can generate a report, you must enable time tracking. Only then, you can use the tracking data to create a time report.
Here’s how you can enable and configure a Jira time report.
Step 1 – Enable Tracking Permission
Jira lets you use several user access levels and tracking permissions for the users to enable time tracking. You can find the Tracking Permission settings here:
Go to: Settings → Issues → Permission Schemes → Permission
Here you will see the time tracking permission option with the default level set as “Work on Issues”. You can change the default setting from using the Edit option. Here the permission schemes you can switch to:
- Work On Issues: Enables users to log time on issues
- Delete All Worklogs: Permits users to delete all work logs from any issue.
- Delete Own Worklogs: Allows users to delete only their own work logs.
- Edit All Worklogs: Enables users to edit the work log of any other user on an issue.
- Edit Own Worklogs: Allows users to edit only their own work log entries.
Step 2 – Activate Time Tracking
Using a Jira cloud project, you will find the time tracking option is available by default. However, if you are using a project on the server, you will need to enable time tracking in Jira manually through the API configurations.
You can enable or disable the time tracking from the configuration menu. You can either add or remove the time tracking field from your team projects.
Step 3 – Configure Time Tracking Functionalities
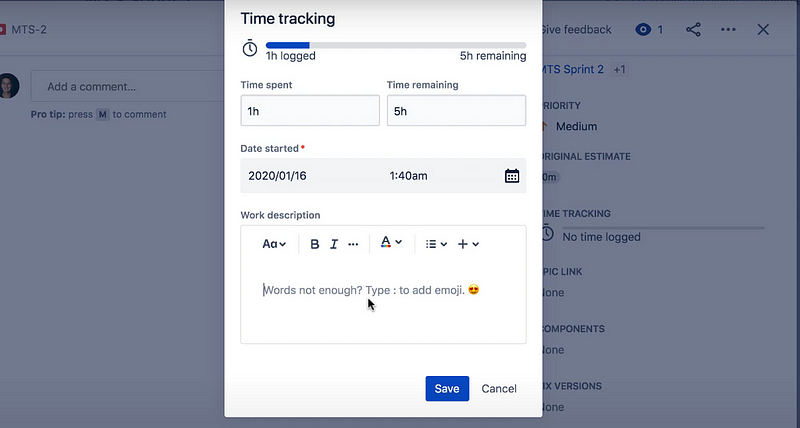
Once you have enabled the time-tracking feature, you can configure the following settings:
- Worklog Level: Here, you can choose from three levels of work log entry – Start/Stop, Duration and Logging.
- Time Formatting: You can customize how your time is displayed in reports by selecting one of the available formats – Hours, Minutes, or both.
- Time Tracking Granularity: This setting lets you adjust the smallest unit for tracking time with either hours or minutes as options.
- Estimate Time Remaining Field Visibility: If visible to users on their boards and backlogs, they can estimate the time remaining on each task.
Step 4 – Ingrate a Third-party Provider
If you want to get the most out of your Jira time report, it’s a good idea to integrate a third-party provider such as Day.io. This will provide further insights into how team members spend their time and give more accurate invoicing information.
While Jira natively offers many primary time tracking features, a third-party provider can provide more advanced functionality such as time budgeting, automatic invoicing, and real-time notifications.
Step 5 – Generate a Time Report
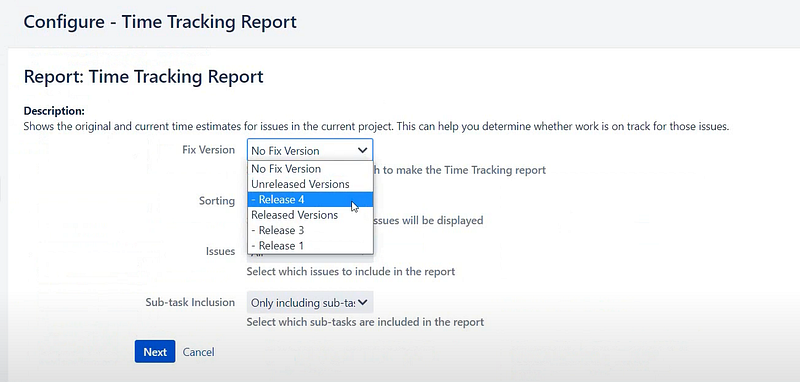
Once you have configured your timesheet, you can proceed with generating your Jira time report. The Time Tracking Report is located in the Forecast and Management section under the Reports in the your Jira dashboard’s sidebar.
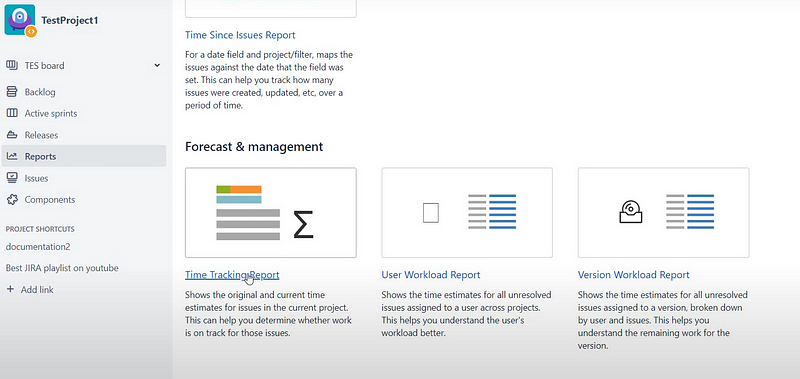
Here you choose your Jira time report configurations from the following options:
- Fix version
- Sorting (most completed ones on top or least completed ones on top)
- Issues (All, incomplete, or original estimates)
- Subtask Inclusion (All subtasks, or subtasks with a particular version)
Now, you can click Next to generate your time report.
Jira Time Report Limitations
Despite Jira offering an extensive range of features for tracking and reporting time, there are still some limitations, such as:
- Minimum 60 seconds of time log: The minimum time log entry in Jira is 60 seconds. This means that if an employee works for less than a minute on any task then Jira does not track it in the timesheet, leading to inaccuracies in the long term.
- Limited productivity tracking other than hours worked: Hours worked is only one aspect of productivity. You can’t track other aspects such as task completion rate, quality of work, and customer satisfaction using Jira time reports. This can make it difficult to measure your team’s overall performance in an accurate way.
- No idle time tracking: When employees spend time on activities outside of work such as taking breaks, attending meetings or going to lunch, Jira time reports do not clarify it. Thus, you won’t be able to accurately measure the amount of idle time your team spends during the day.
- No activity tracking: Jira does not natively include advanced activity tracking methods such as keystroke-based monitoring, mouse clicks, or, keeping screenshots. .
Fortunately, you will find a number of third-party tools that can help you overcome these limitations.
Best Jira Time Report Tools
We will now look at some of the best Jira time report tools to help you get more out of your Jira time reports.
1. Day.io – Best Overall Jira Time Report Tool with Detailed Tracking
Day.io is an excellent tool for tracking and reporting on time spent on Jira projects. With the control panel, users can monitor every action reported and generate detailed reports with the total hours of each task, cost of service, budget status, and more.
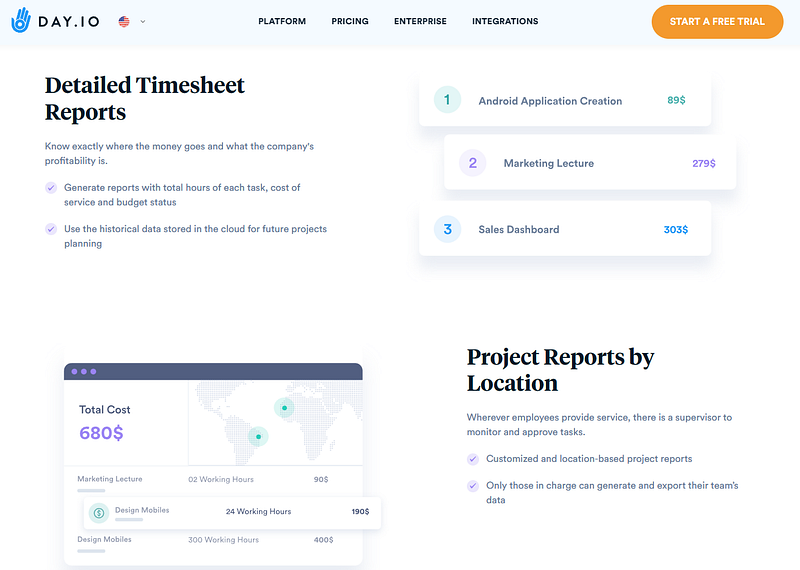
Additionally, Day.io stores all historical data in the cloud to help with future project planning efforts such as time and attendance estimation and project planning. This makes Day.io an invaluable resource for businesses that need to keep up-to-date records of their employees’ productivity levels while also having access to powerful analytics tools that can inform strategic decision-making.
Features
- Project and activity reporting
- Activity tracking in real time with task filtering
- Section and task-based monitoring
- Exporting entries to chosen formats
- Automatic or manual timesheet approvals
- Cloud storage for timesheet data
- Cost breakdown based on predefined conditions
- Location-based report tracking
- Project cost and bill breakdown
- Anti-fraud time tracking and attendance records keeping
Pricing
Day.io offers two versions of their app. Time tracking and reporting functions cost you $5 per user/month and project management functions cost $8 per user/month.
2. Hubstaff – Best for Proof of Work Tracking
Hubstaff for Jira is an easy-to-use time-tracking platform that helps teams accurately track their time to tasks in one click. This app integrates seamlessly with Jira, allowing teams to see which issues consume most of their time and effort. Hubstaff calculates activity levels based on keyboard and mouse input from team members to ensure accurate measurements.
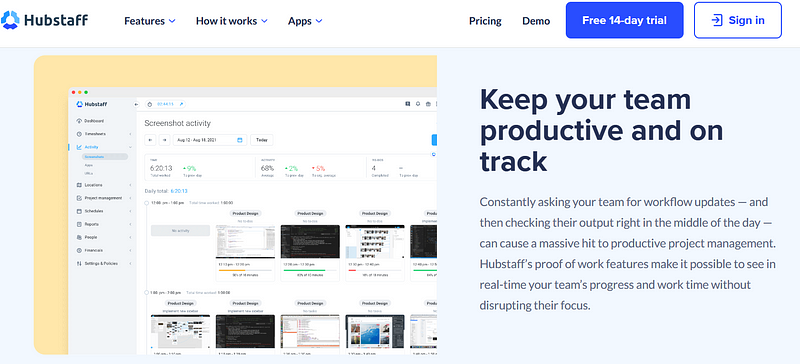
For added transparency, users can opt into the screenshots feature to easily monitor how work is done in real-time. With this comprehensive solution, Hubstaff for Jira provides a reliable way for teams to measure productivity and effectively manage their resources.
Features
- Time tracking with screenshots
- Automatic payroll calculation
- Activity level monitoring
- Employee scheduling
- Dashboard and reporting tools
- Customizable invoicing and payment processing
- Automated employee onboarding process
- Client management tools & project budgeting
Pricing
- Hubstaff Time: Free for one user. $14 for 2 users per month.
- Hubstaff Desk: Free for one user. $14 for 2 users per month – Includes proof of work and activity level tracking.
- Hubstaff Field: Starts from $24 for 2 users per month – Includes GPS based tracking and team-level activity monitoring.
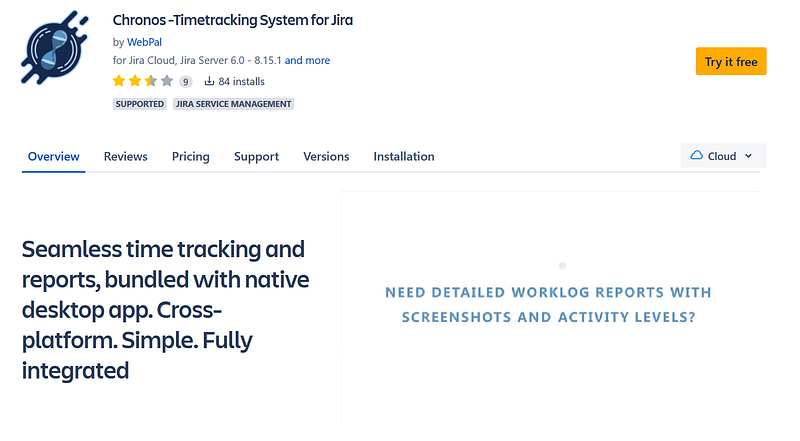
3. Chronos – Best for Time Reporting with Desktop App
Chronos Time Tracking for Jira is the perfect way to streamline time tracking and reporting within your organization. It’s a simple, cross-platform solution that integrates seamlessly with Jira, so you can easily track time spent on tasks and generate comprehensive reports in no time. Best of all, Chronos comes with a native desktop app, making it even easier to start tracking quickly – install it, and you’re ready to go!
Features
- Accurate and detailed tracking of all your work activities
- Viewing both team and individual performance over any given period
- Track time from anywhere, including mobile devices
- Easily switching between projects/tasks with just a few clicks
- Creating detailed reports for clients and stakeholders in seconds
- Built-in templates to generate timesheets quickly for payroll purposes
- Reminders about overdue tasks or missed deadlines
- Sending invoices directly from timesheets
Pricing
- Cloud: Flat fee of $10 per month for up to 10 users
- Server: $100 per year for up to 10 users
Wrap-up: Jira Time Reports
Jira time reports are a great way for businesses to track and monitor the performance of remote teams. With accurate data, businesses can identify areas where employees need more support or resources. The third-party tools have made setting up a Jira time report even easier.
Day.io lets you take Jira reporting to the next level with advanced tracking, planning, reporting, and monitoring functions. The comprehensive reporting capabilities mean you’ll have an effective system that helps you efficiently manage your team.
The 5-day free trial plan of Day.io is an excellent option for you to check out all the time report features without paying a dime. Sign up for the Day.io free trial today!