As a project manager, keeping track of your time on each task is essential. This is especially true when working with multiple teams and projects at once. ClickUp, a leading cloud-based project management platform, offers an easy way to do this through its Time Tracking feature.
Today we will discuss what Time Management on ClickUp is, how to use it effectively, and the best time-tracking tools for you to take advantage of.

What is Time Management on ClickUp
Time Management on ClickUp is a feature that allows you to keep track of the time you spend on each task. This helps project managers stay organized and aware of how much time they spend on different tasks and where their resources are being devoted.
What makes Time Management in ClickUp so powerful is that it allows you to easily track your progress over time and identify areas for improvement. Not only can this help with productivity, but it also provides valuable data that you can use to make informed decisions about future projects.
How to Track Time on Each Task in ClickUp
ClickUp makes it simple and easy to track time on each task. Here’s how you can enable the feature and start tracking time in a few easy steps.
Step 1: Enable Time Tracking
You can access ClickUp’s native time tracker through ClickApp and search with Time. Click the below toggle to enable the app. The app is compatible with all your ClickUp Workspaces.
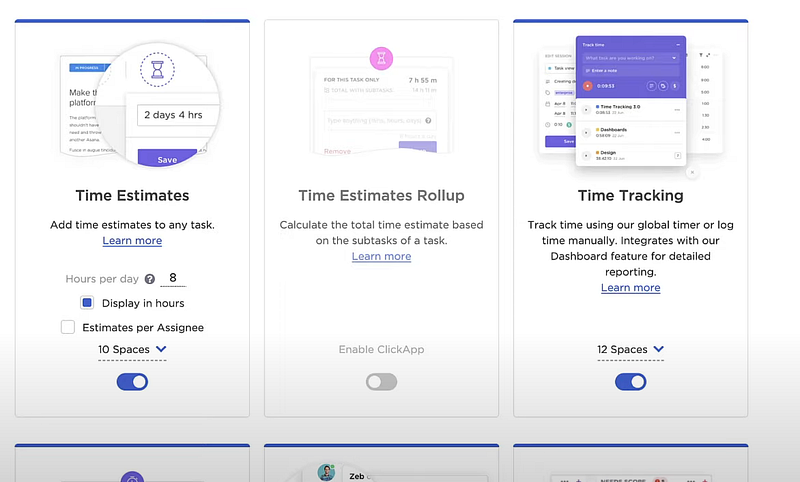
Step 2: Configure Time Tracking
Now you can access the time tracking ClickApp from the bottom right corner of your ClickUp dashboard by clicking on the Play button.
Afterwards, a window will pop up, letting you configure the time-tracking options on ClickUp. You can set how to track time (manually or automatically), how to track duration (by minute, hour, etc.), and what type of tasks you’d like to track (tasks only or all tasks).
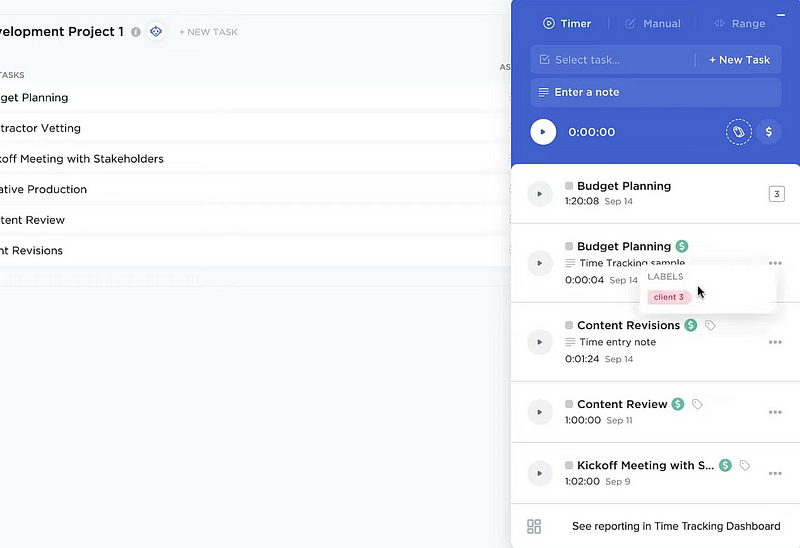
Step 3: Start Tracking Time
Once you’ve enabled and configured time tracking on ClickUp, it’s time to start tracking your tasks. To do this, click the Play button next to each task in your dashboard. This will start a timer that will track the amount of time you spend on the task and store it in your timeline.
You can also manually enter how much time you spent on a particular task by clicking “Add Time” under the specific task and entering the duration of time in hours or minutes.
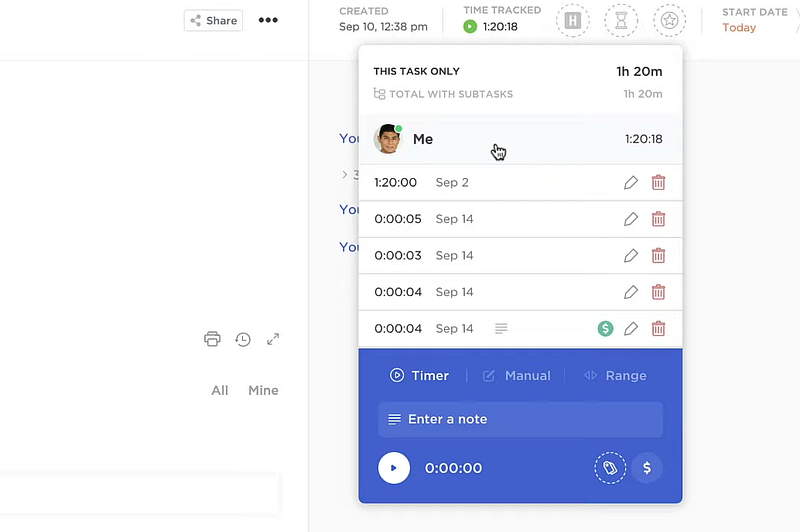
ClickUp also shows you the time duration for each session when clicking on the user’s profile picture. You can also manually edit or delete entries for specific sessions.
Step 4: Create Time Reports
The best way to use time-tracking data is to generate reports. You can do this by enabling the Time Reporting option from the Time Tracking option.
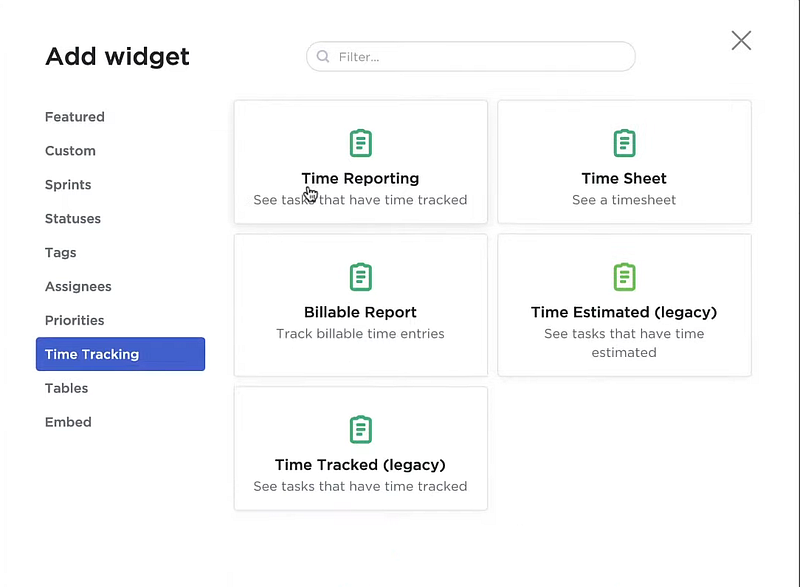
Once enabled, you can filter tasks by various criteria (user, workspace, or project) and view a summary of the total hours tracked for each task. This makes it easy to follow how much time has been spent on different tasks over a given period.
ClickUp Time Management Best Practices
To get the most out of Time Management on ClickUp, you should follow a few best practices, as outlined below:
- Use specific goals to track your time: When setting tasks, ensure they have specific goals. This will help you better understand how much time it takes to complete each task and if any changes need to be made to increase efficiency.
- Set up reminders for yourself: Reminders can help keep you on top of the tasks that specific deadlines must complete. You can also set up reminders for team members to ensure that tasks are completed on time.
- Analyze the data: Looking at your data can help you identify areas where you are spending too much or too little time and potential bottlenecks in the workflow.
- Use time estimates: ClickUp has a unique feature that saves you from procrastination. You can estimate how much time you will need to complete tasks and then use the data collected to adjust your strategy accordingly.
Do you want to take your ClickUp time management to the next level? Turn to the fantastic time tracking and management tools available for ClickUp.
Best Time Tracking Tools for ClickUp
One of the most convenient features of ClickUp is its integration with various third-party time-tracking apps. This makes it easy to track and manage your time and measure productivity across different projects. Here are a few of the best time-tracking tools available for ClickUp:
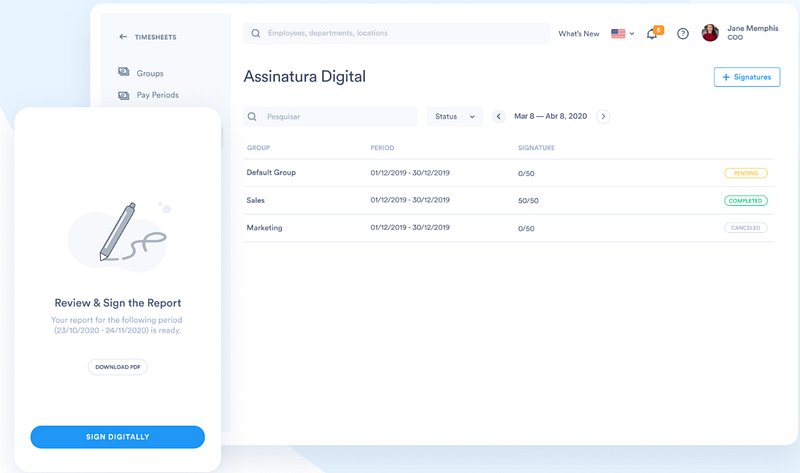
1. Day.io – Best Time Tracking Tool for ClickUp
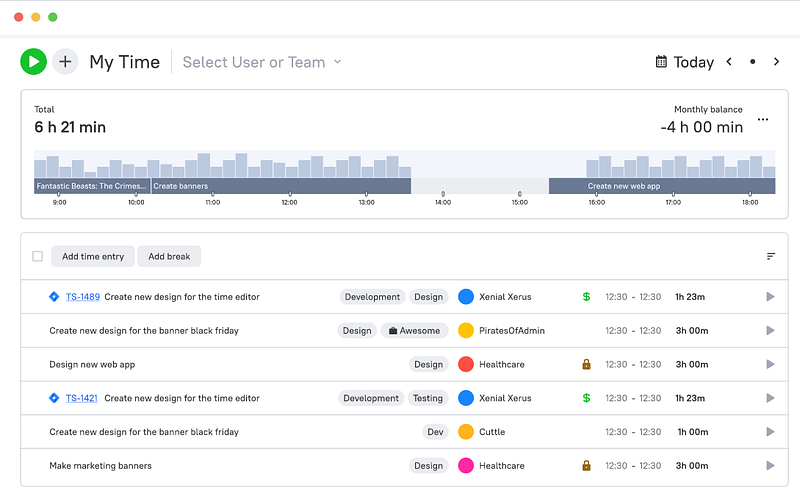
Day.io is the most potent time-tracking tool for ClickUp users. It offers an intuitive interface and efficiently tracks your time on tasks or projects within your workspace. Day.io also comes with industry-leading fraud prevention features, including time-based and location-based tracking.
Features
- Task and time management for individual clients and projects
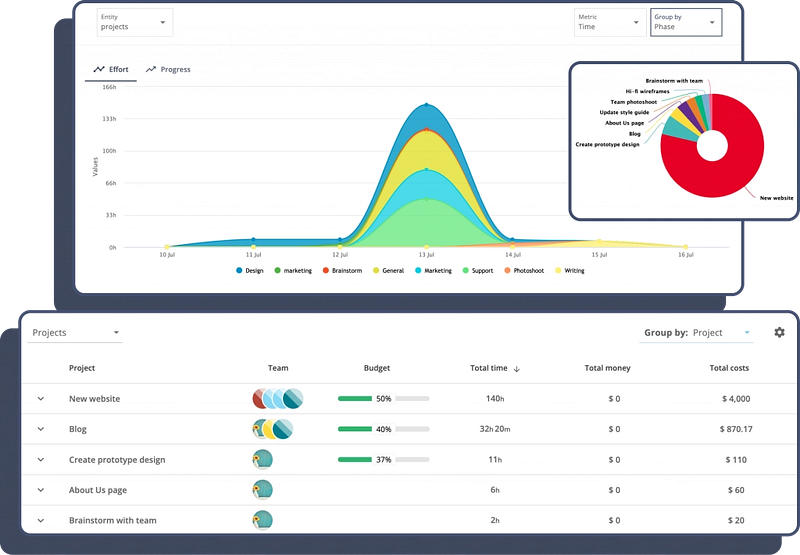
- Project cost and billing reports
- Comprehensive timesheet and report generation
- Location-based project reports for added transparency
- Task-wise summary of time data
- Digital signature management and approval
- Preconfigured and manual timesheet approval
Pricing
Project tracking starts from $6 per user/month and attendance tracking starts from $4 per user/month.
2. TMetric – Best for Simplicity with Time Tracking
TMetric is a great time-tracking app for ClickUp users looking for simplicity. It has an easy-to-use interface and includes features such as start/stop timers, task reports, and more.
Features
- Automated desktop, iOS, and Android apps for easy and convenient time tracking
- Offline time tracking
- Activity level tracking and reporting
- Website and app usage tracking
- User activity summary and reporting
- Large number of integrations
Pricing
- Basic time tracking: Free
- Business: $7 per user/month
- Professional: $5 per user/month
3. Timeneye – Best for Productivity Tracking
Tracking time alone isn’t enough to improve productivity. That’s where Timeneye comes in. This powerful app provides more detailed insights into how your team spends their time, allowing you to identify areas for improvement and increase efficiency.
Features
- One-click time tracking and reporting
- Project tracking with detailed reports for hours worked
- Highly visual reports and insights based on time data
- Full-featured mobile apps
- Billable time management
- Team and client management
Pricing
Starts from $7 per user/month.
Wrap-Up: ClickUp Time Management
ClickUp lets you keep track of your time on each task, helping you stay organized and productive. Using the best practices outlined above and taking advantage of third-party tools, you can ensure that your projects are completed on time and within budget.
Integrating Day.io with your ClickUp can help you easily manage complex projects and provide a comprehensive overview of your progress over time. Sign up for Day.io today and see how it boosts your ClickUp time management experience.